Quick Start
Get started with DebuggAI in 4 steps.
1. Connect GitHub Repository
Sign up and link your repository:
- Create account at app.debugg.ai
- Navigate to Settings → GitHub Integration
- Connect your repository
- Project auto-creates via webhooks
2. Configure Environment
Add required secrets in your project's Environment tab:
DATABASE_URL- Your database connection- Other secrets from your staging deployment or test enviroment (API Keys, API Urls, etc)
3. Configure Triggers
Configure when tests run automatically:
- Navigate to your project's GitHub tab
- Enable GitHub Integration toggle
- Configure Pull Request Triggers:
- Run on PR Opened - Test new pull requests
- Run on New Commits - Test each commit pushed to PR
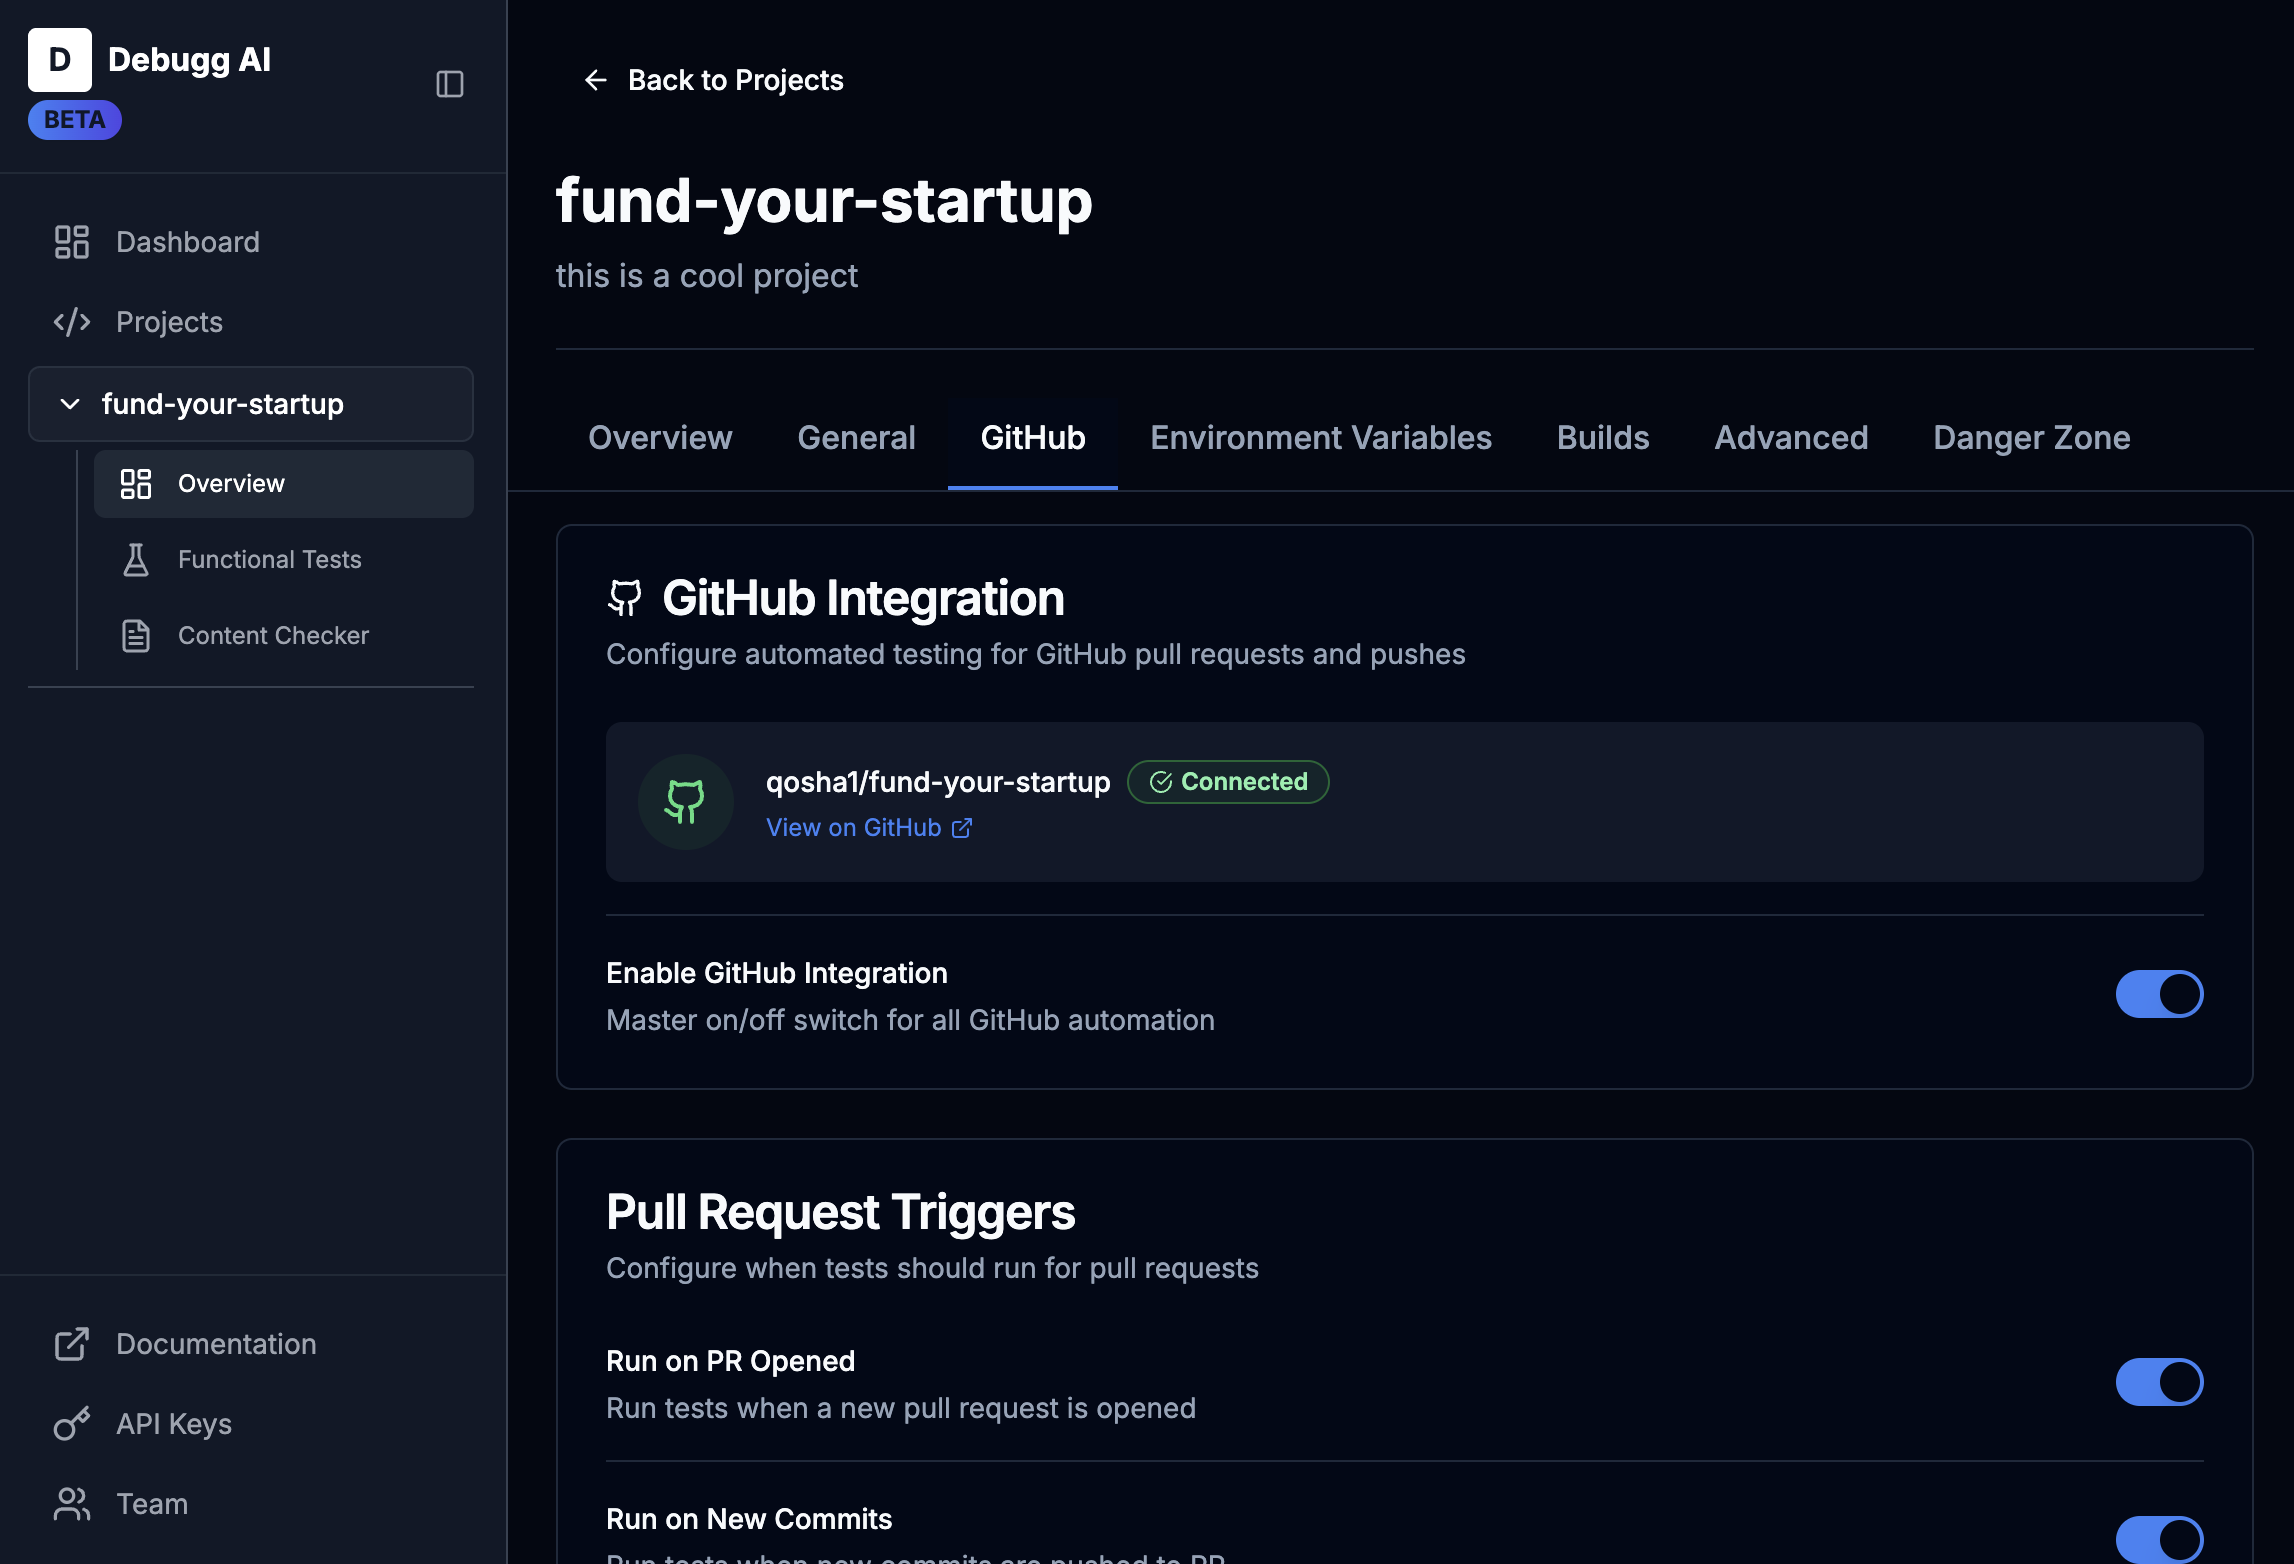
Tests now run automatically on your selected triggers.
4. Run Tests
That's it! The ci/cd flow will now trigger on the events you setup in step (3) and attempt to build and run your app so that it can test against it.
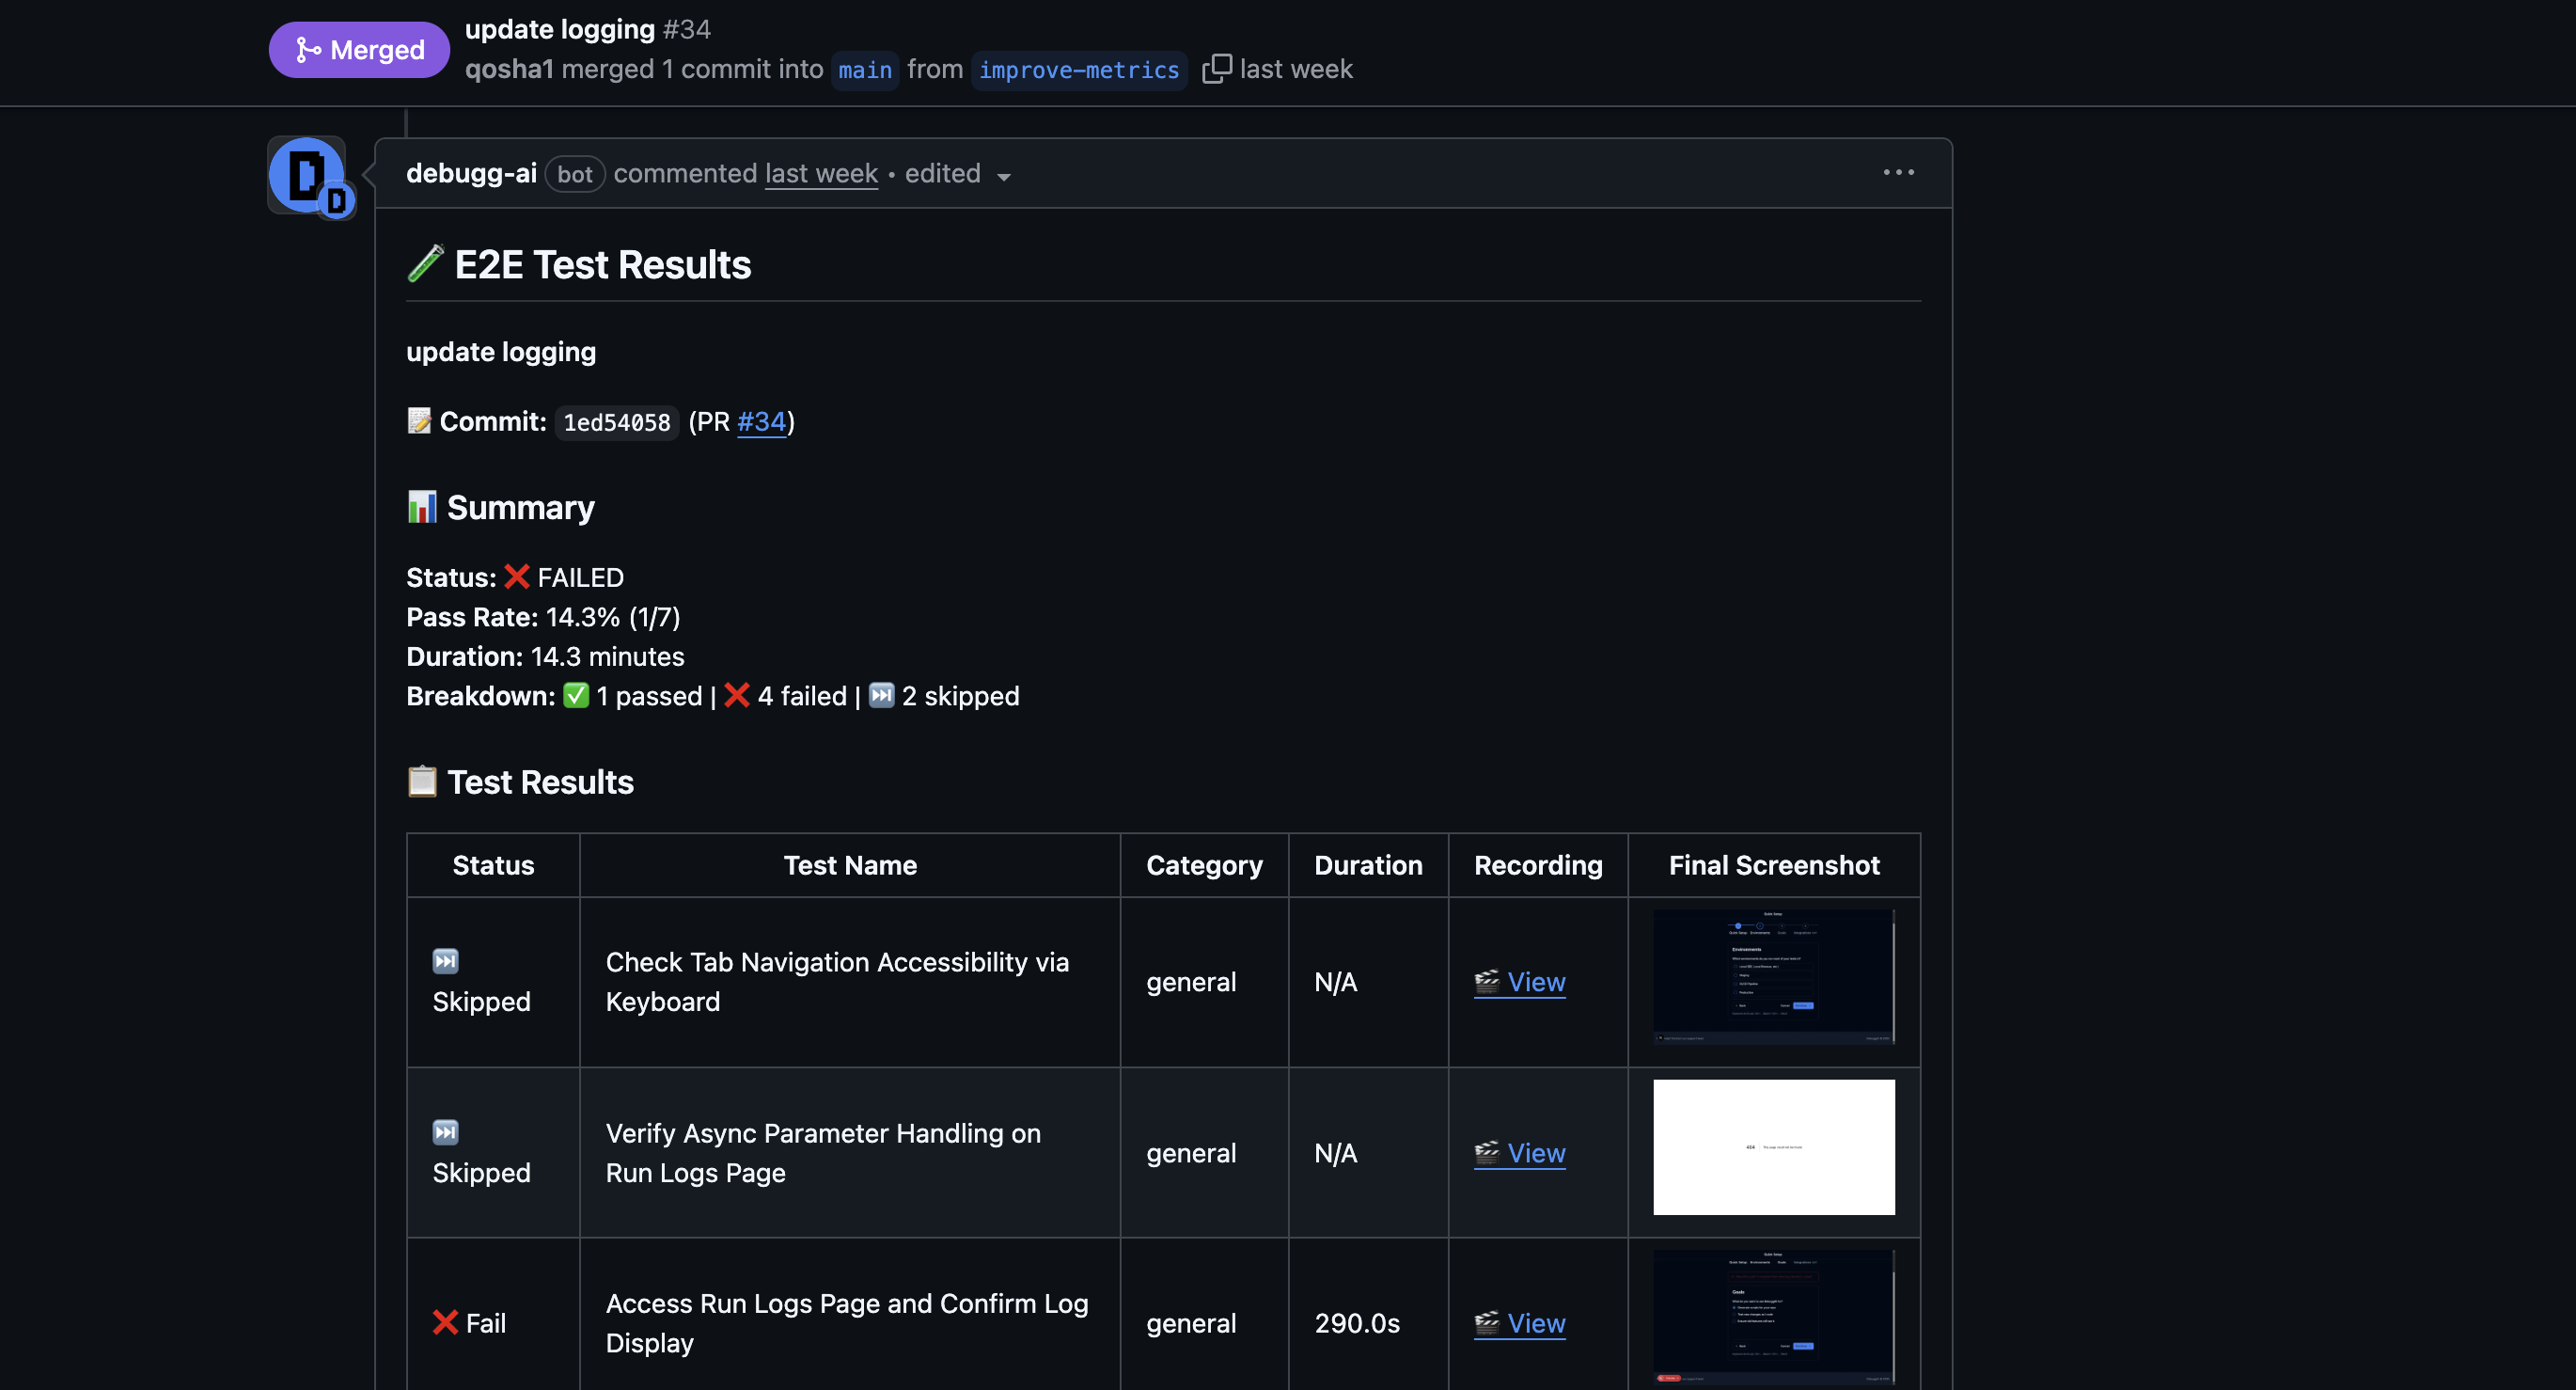
Note: please keep an eye on the builds tab of new projects to see whether they properly build and then run in the remote testinng environment. Sometimes there may be minor configuration or build command changes that need to be made. Once setup though, this should not be a problem.
If you have issues please email support@debugg.ai